
The Meta Business plugin allows you to export your marketplace listings in a .csv format specifically designed for Facebook Merchant/Meta Business. Follow the steps below to activate the plugin, map your marketplace categories to Facebook categories, and export your listings.
Step 1: Activating the Meta Business Plugin
To start using the Meta Business plugin, you first need to activate it:
-
Navigate to the admin panel.
-
Go to the following URL directly: /admin/apps/meta-business/settings.
-
On the settings page, activate the Meta Business plugin by toggling the switch.
After activation, a new Export for Facebook button will appear at the top of your listings list.
Step 2: Mapping Marketplace Categories to Facebook Categories
Once the plugin is activated, you can map your marketplace categories to the corresponding Facebook categories:
-
Go to Settings > Listings > Listing categories in your admin panel.
-
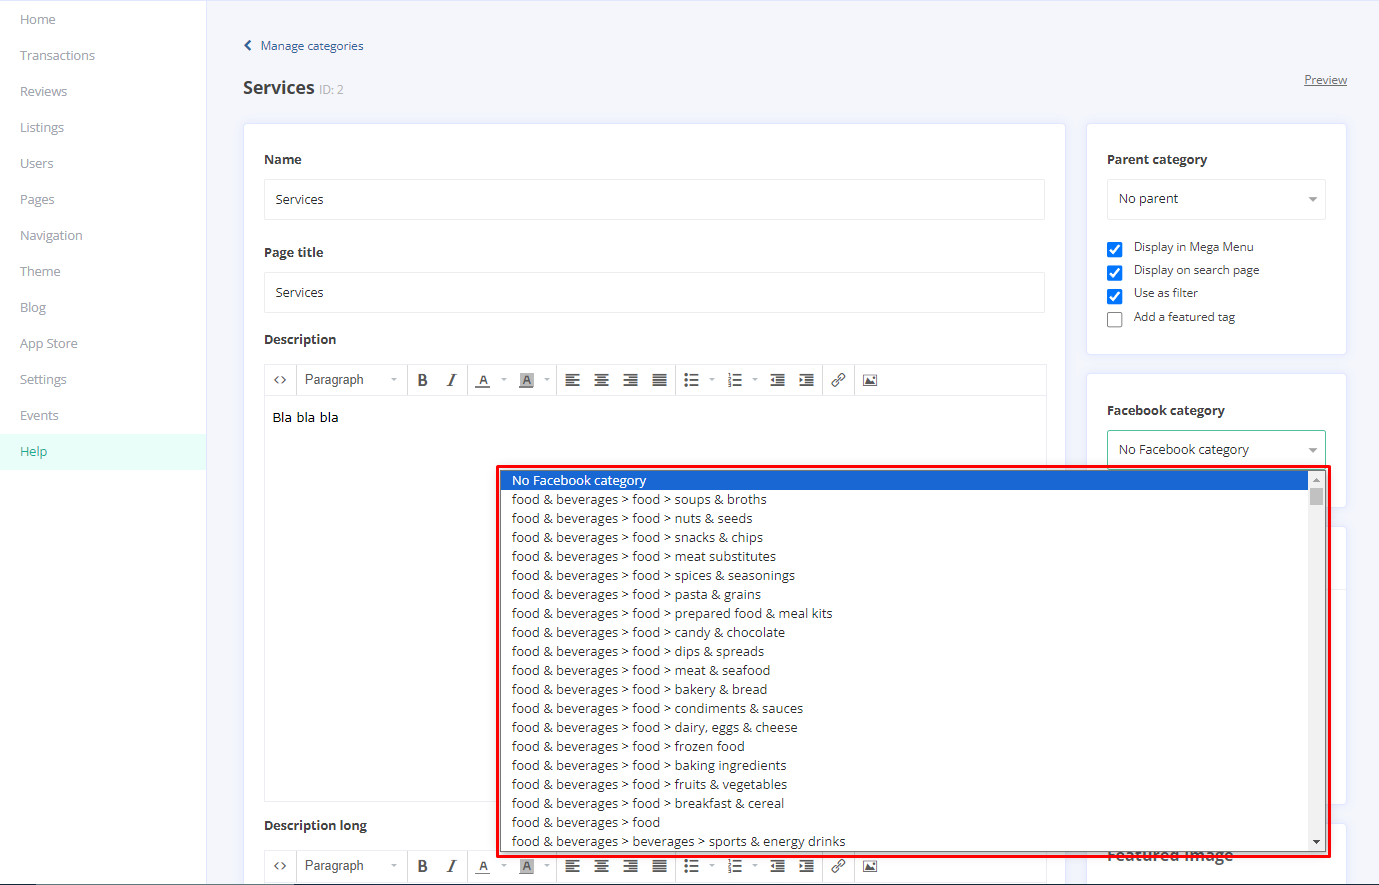
A new panel for category mapping will be available.
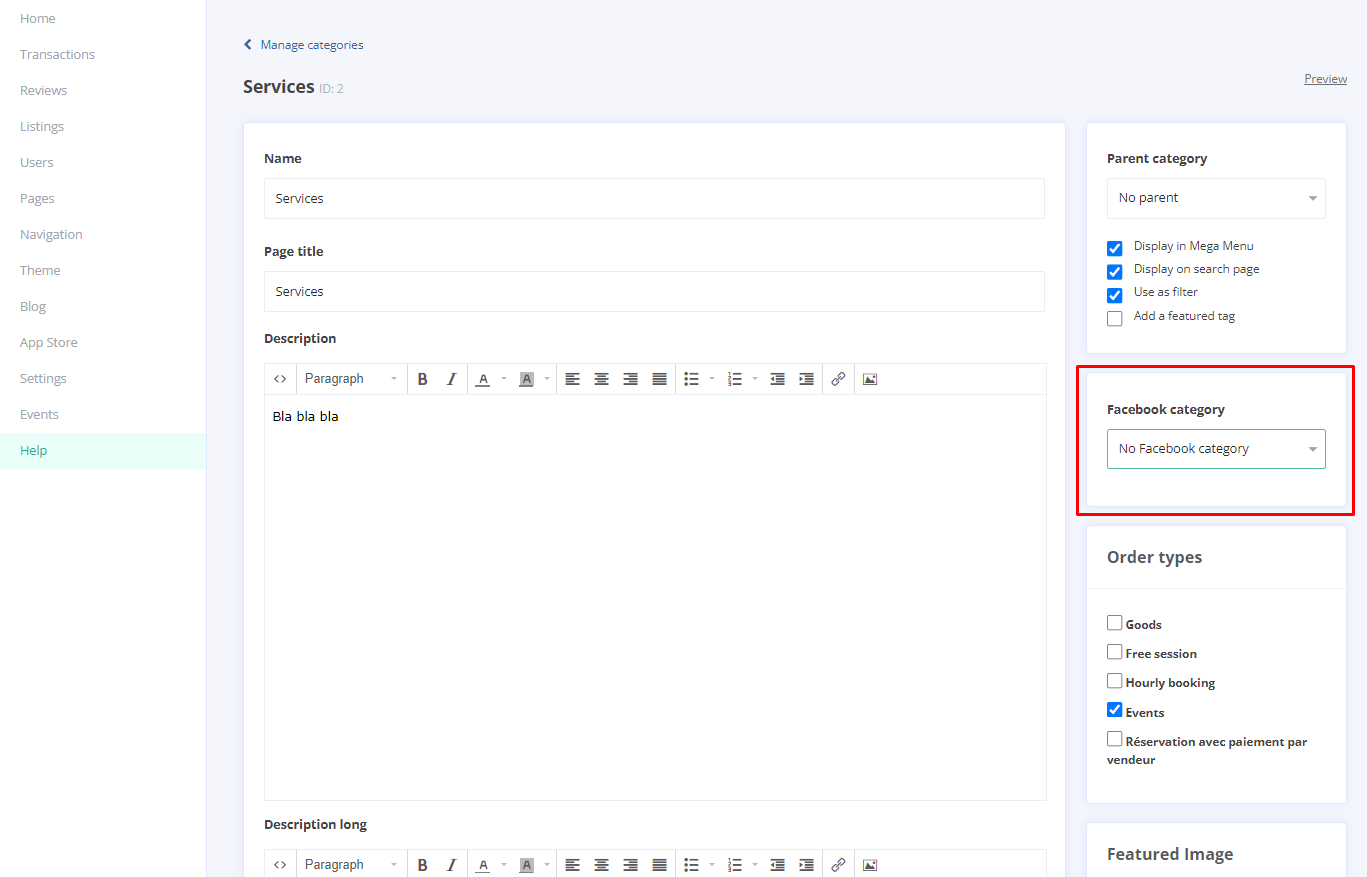
- Use the dropdown menus to align your marketplace categories with the appropriate Facebook category.
Step 3: Exporting Listings for Facebook
With your categories mapped, you can export your listings:
-
Go back to the listings list in your admin panel.
-
Click on the Export for Facebook button.
This will generate a .csv file formatted for Facebook Merchant/Meta Business.
Important Note: The export process is manual, so you must upload the .csv file to Facebook Merchant/Meta Business.