
What This Article Covers
This article walks you through the full initial setup of Stripe Connect Custom on your Kreezalid marketplace: creating and configuring your Stripe platform account, entering your API keys, verifying webhook configuration, and running a sandbox test before your first real vendor goes live.
Before You Start
With Stripe Connect Custom, you — the marketplace operator — hold the Stripe platform account. Your sellers do not need to create their own Stripe accounts. They are onboarded as connected accounts under your platform, and Stripe handles their identity verification automatically through a hosted form.
What you will need to complete this setup:
- A Stripe account (free to create — you can use an existing one, but a dedicated account is recommended)
- Access to your Kreezalid admin panel
- Your marketplace’s public URL
Step 1: Create and Activate Your Stripe Account
Go to dashboard.stripe.com/register and follow Stripe’s setup guide to create and activate your account. Stripe will walk you through everything — business or personal details, identity verification, and bank account information.
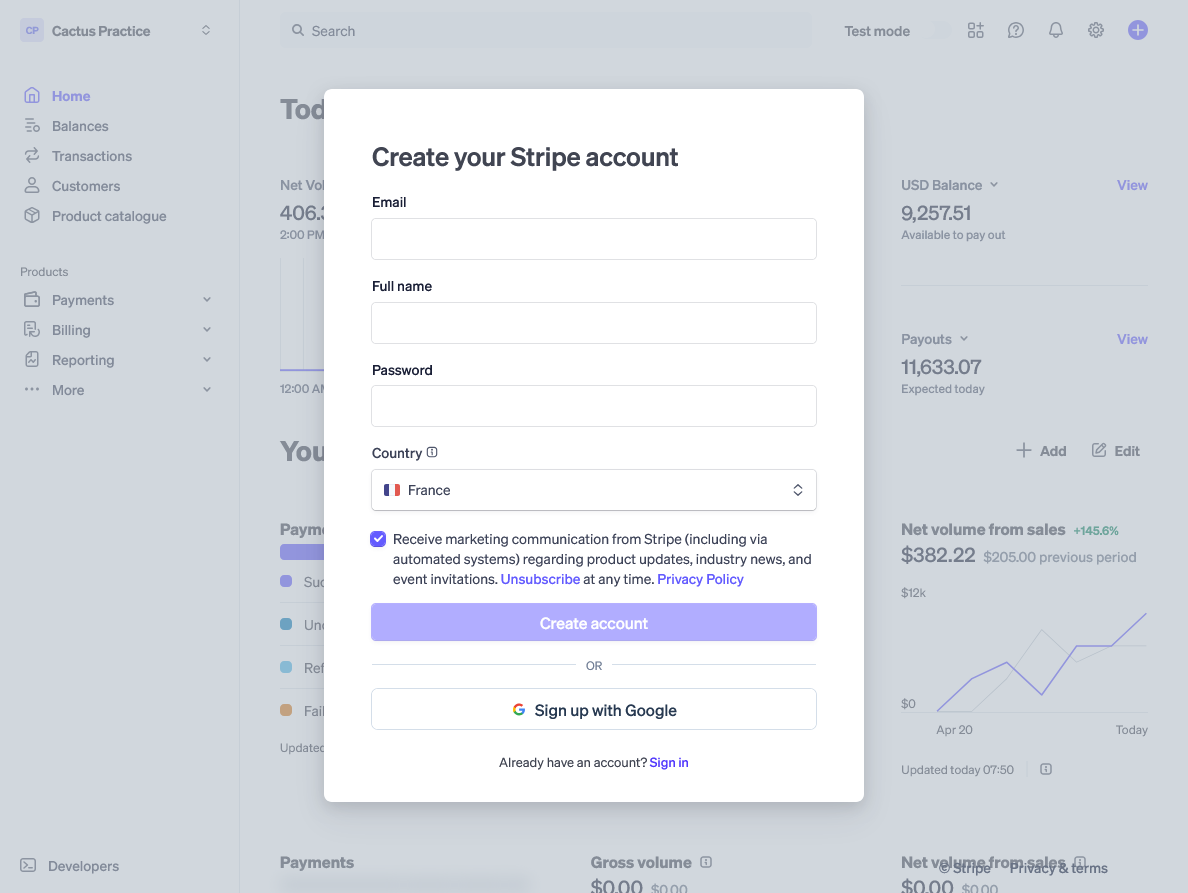
A few things to keep in mind:
- When asked for your website, enter your marketplace’s public URL
- If you already have a Stripe account for another project, we recommend creating a dedicated one for your marketplace to avoid any configuration conflicts
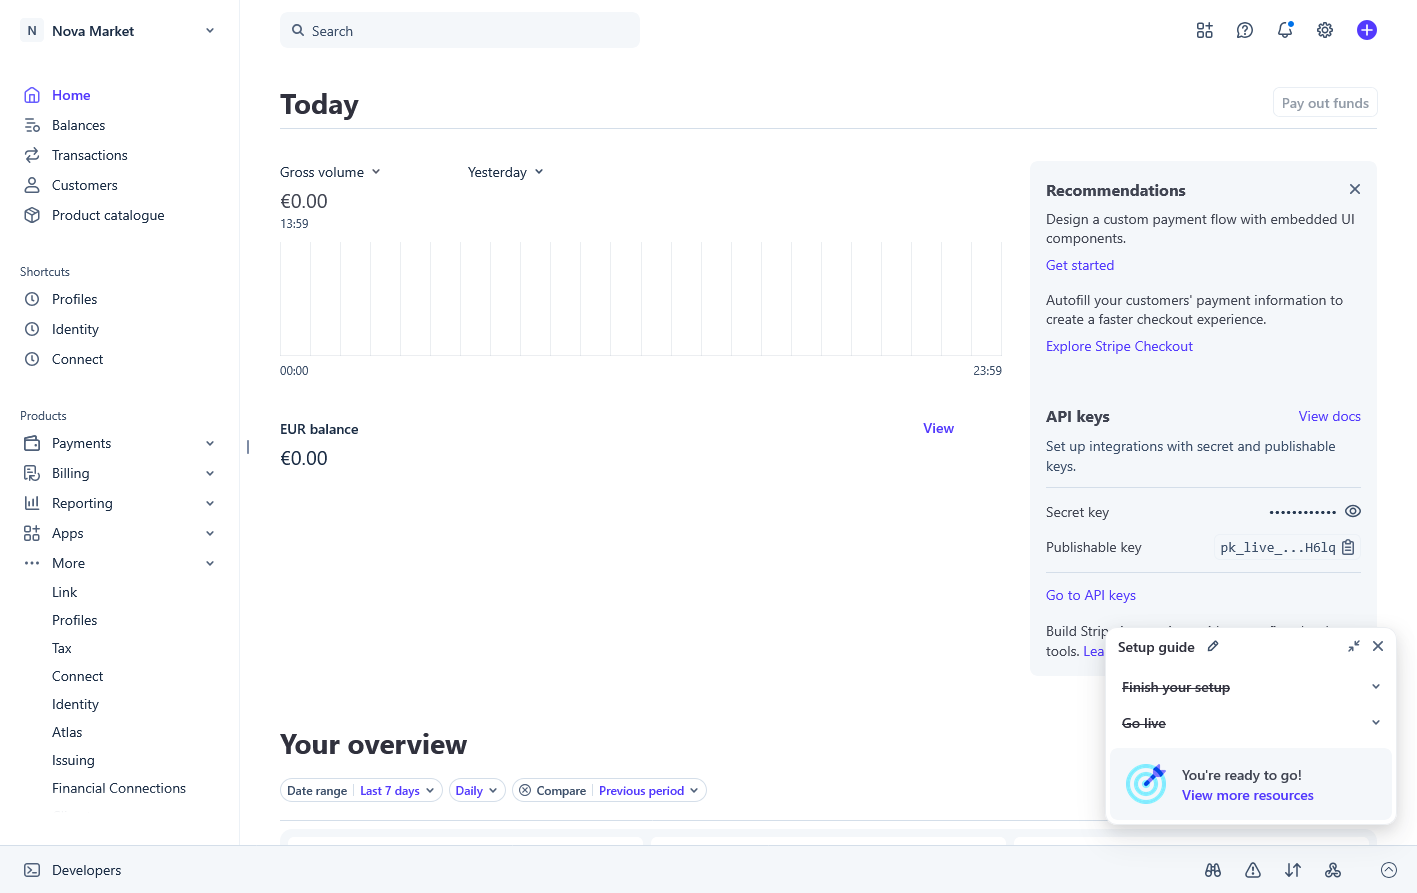
- Your account may go through a short review before being fully activated — this is automatic
Step 2: Configure Stripe Connect
Stripe Connect is the feature that allows your sellers to receive money through your marketplace. You need to enable it and configure it for Custom accounts.
Enable Custom accounts
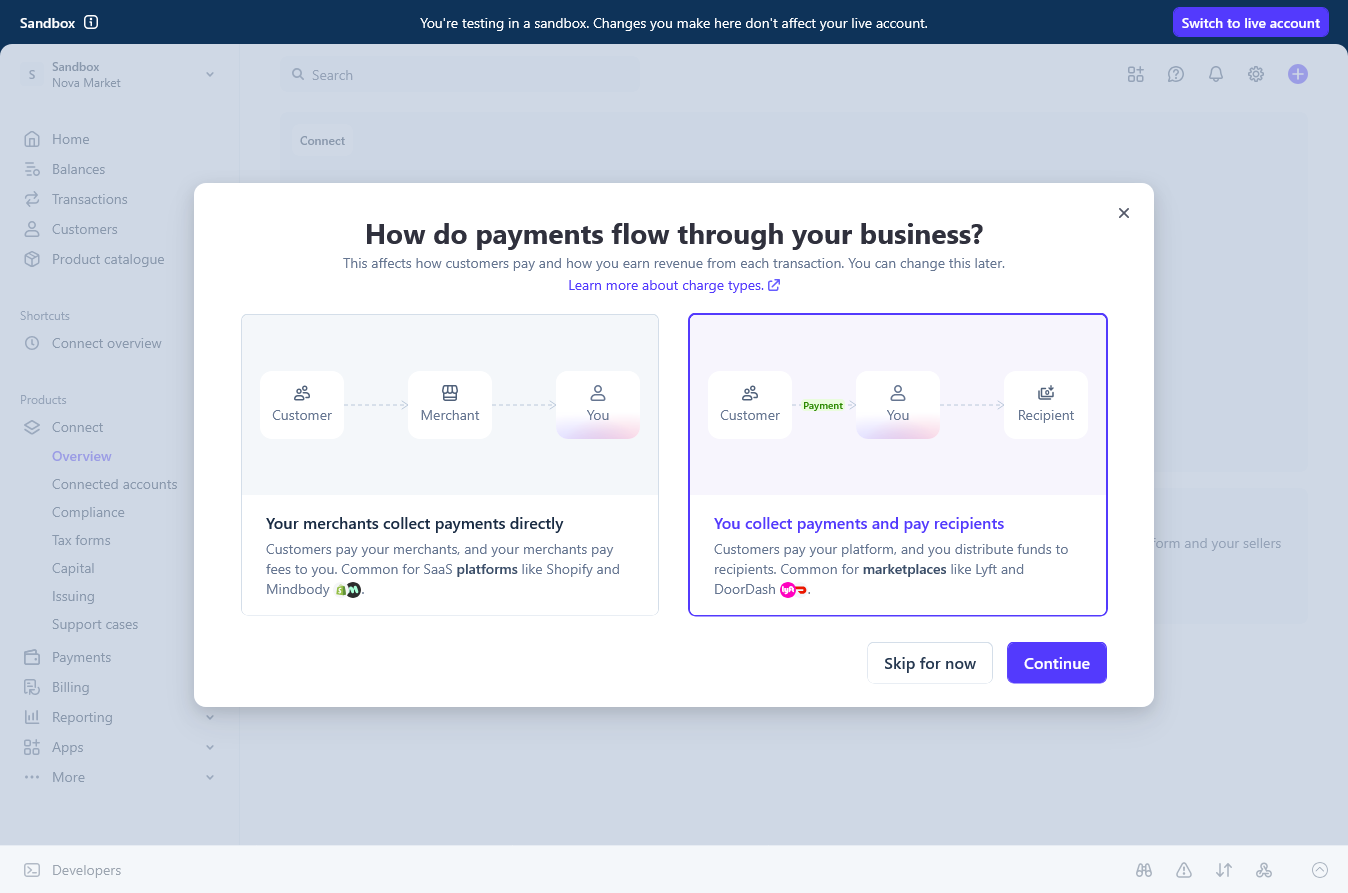
- In the Stripe top navigation, click Connect then Get started.
- It will redirect you to the Connect settings page.
- When asked “How do payments flow through your business?”, select You collect payments and pay recipients.
- Finalize the setup flow and complete the identity verification (Connect requires another identity verification step for your platform account).
Configure branding
Go to Settings → Account settings: Business -> Branding in your Stripe dashboard and fill in the following:
- Your marketplace name and business name
- Your logo and icon
- Your brand colors
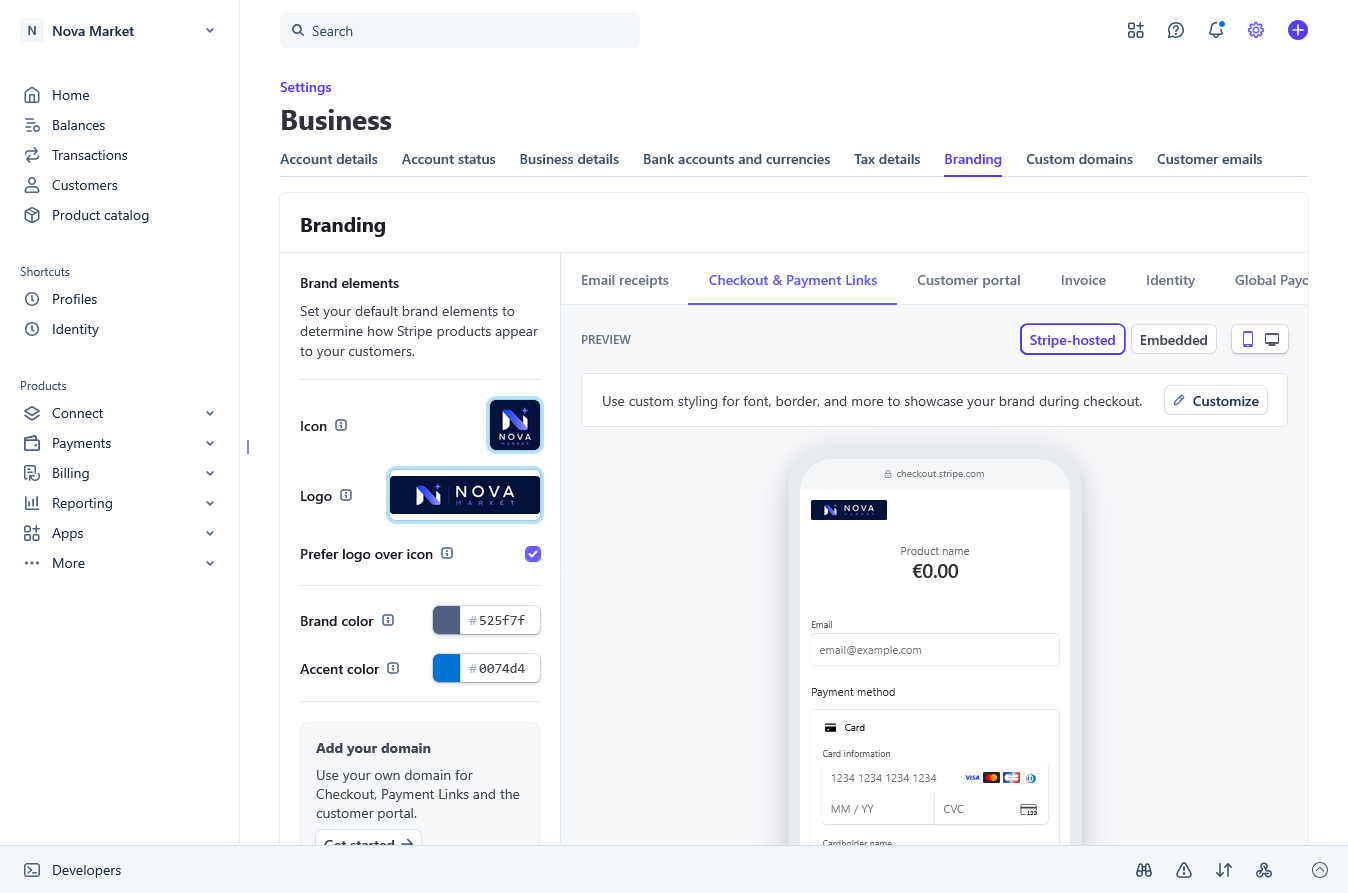
Then, go to Settings → Product settings: Connect → Manage connected account dashboards: Stripe Dashboard in your Stripe dashboard and activate: Copy platform branding.
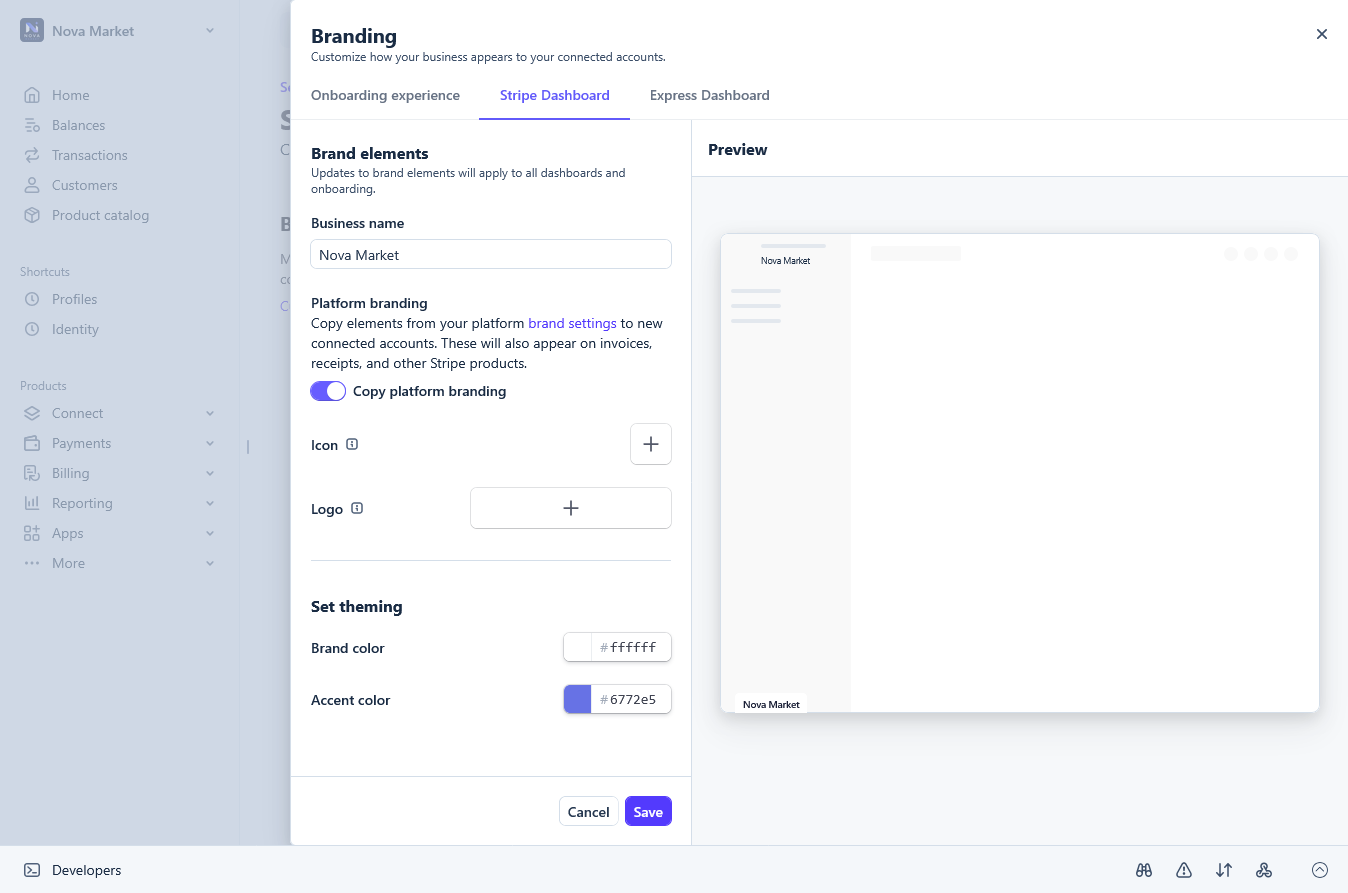
This branding appears on the Stripe-hosted pages your sellers use during their onboarding and on the Stripe Checkout payment page if you activate it.
Step 3: Test With a Sandbox Account Before Onboarding Vendors
Before entering your live credentials, we strongly recommend testing your full payment flow with a Stripe sandbox (test mode) account. Stripe sandbox lets you simulate payments without processing real money. From your live Stripe account, you can generate a sandbox environment directly — no separate Stripe account is needed.
⚠️ Test the buyer checkout flow first — onboard vendors only after switching to live credentials
When your Kreezalid marketplace is connected to a Stripe sandbox account, any vendor who goes through Stripe Connect onboarding creates a test-only connected account. These test accounts cannot be transferred to production. If you switch to live credentials later, your vendors will need to re-onboard from scratch.
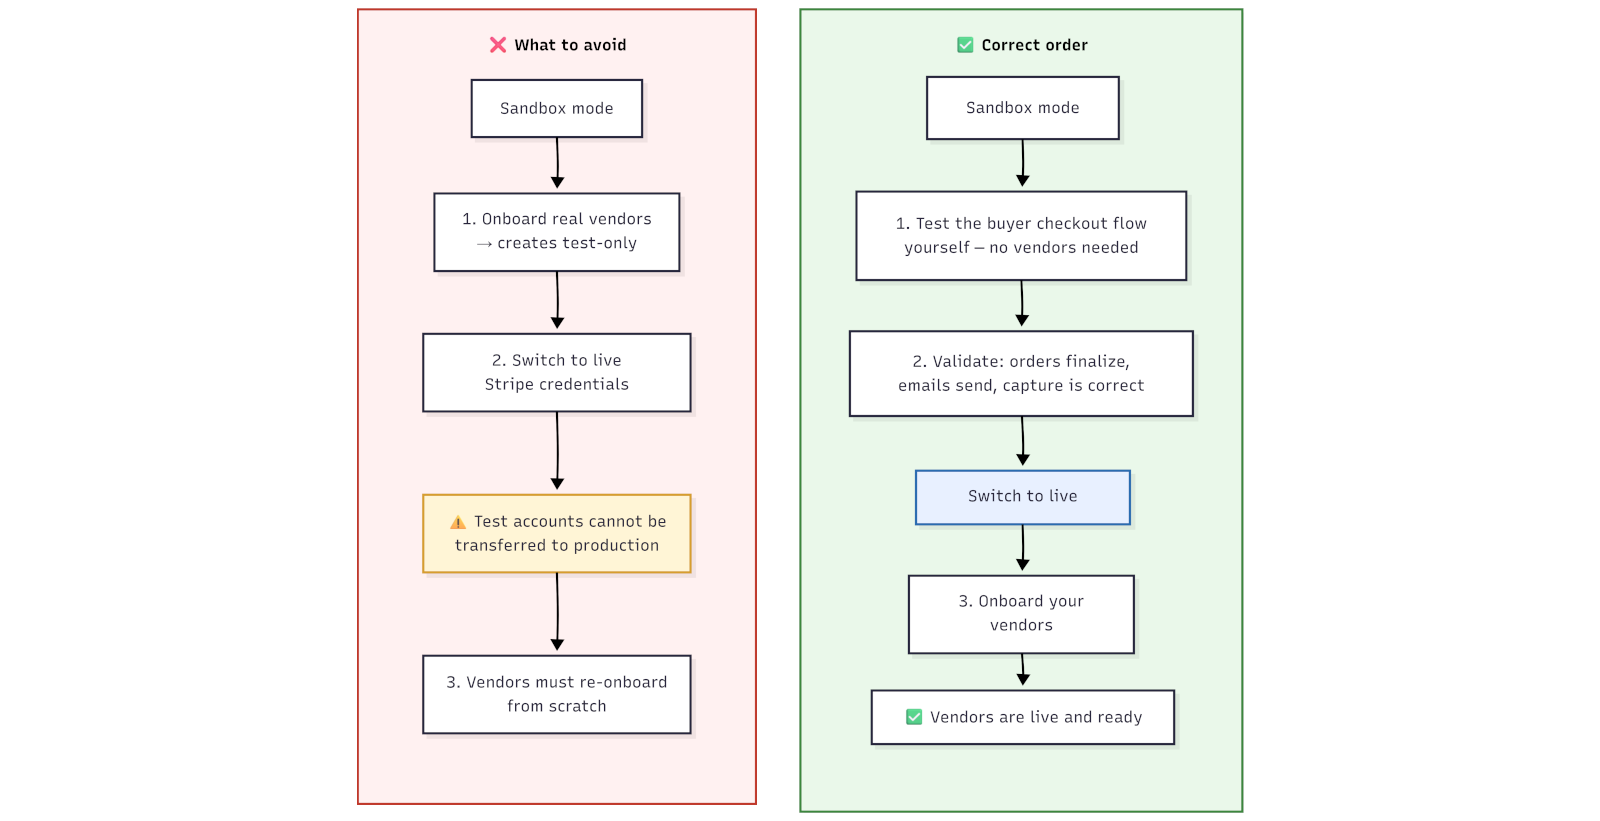
The correct order is:
- Test the buyer checkout flow yourself — no vendor onboarding needed at this stage
- Verify that orders finalize, emails send, and capture behaves as expected
- Switch to your live Stripe credentials
- Only then onboard your real vendors
How to run a sandbox test
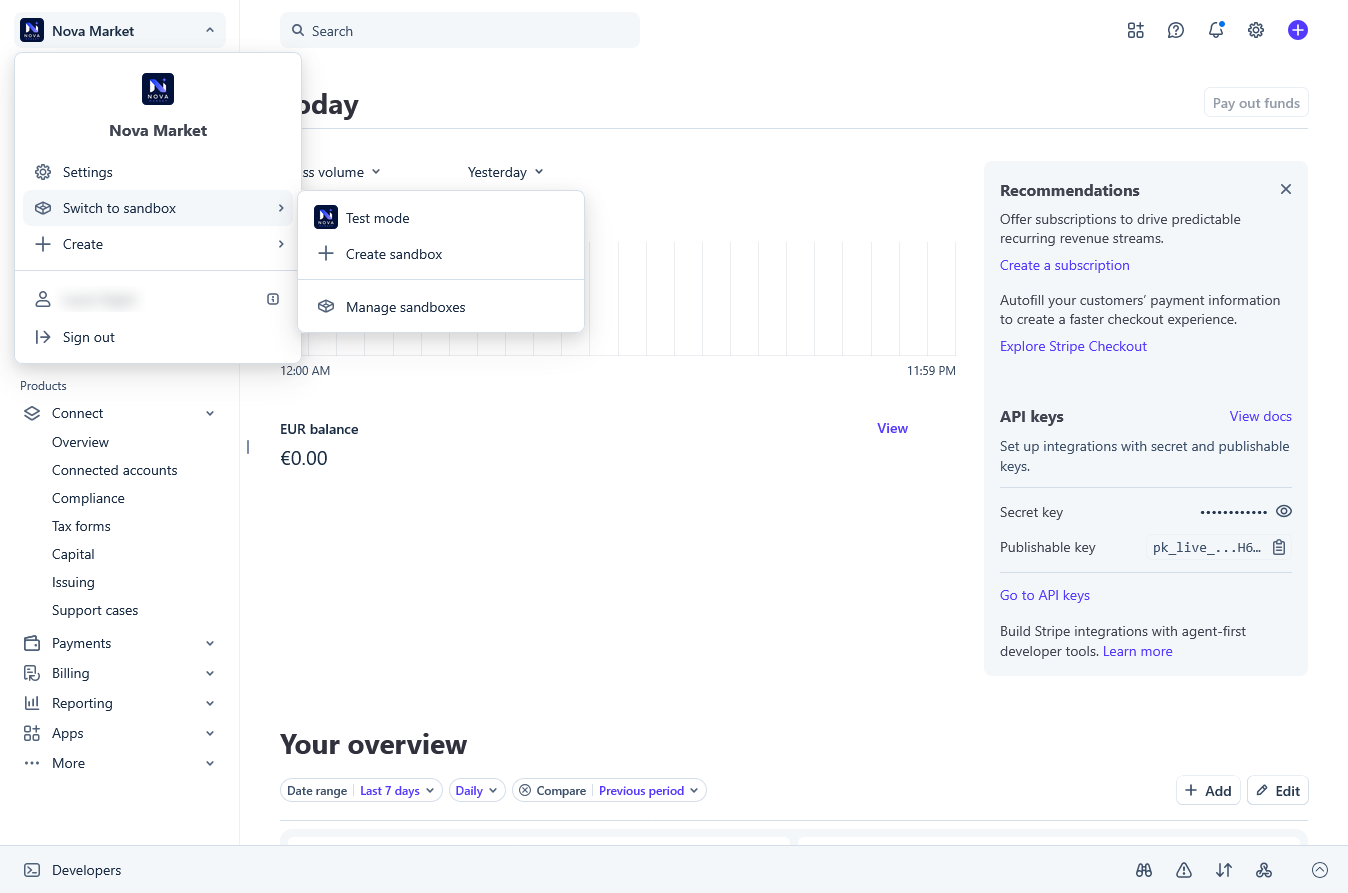
- In your Stripe Dashboard, select Switch to sandbox from the top-right menu — create a sandbox if you don’t have one yet
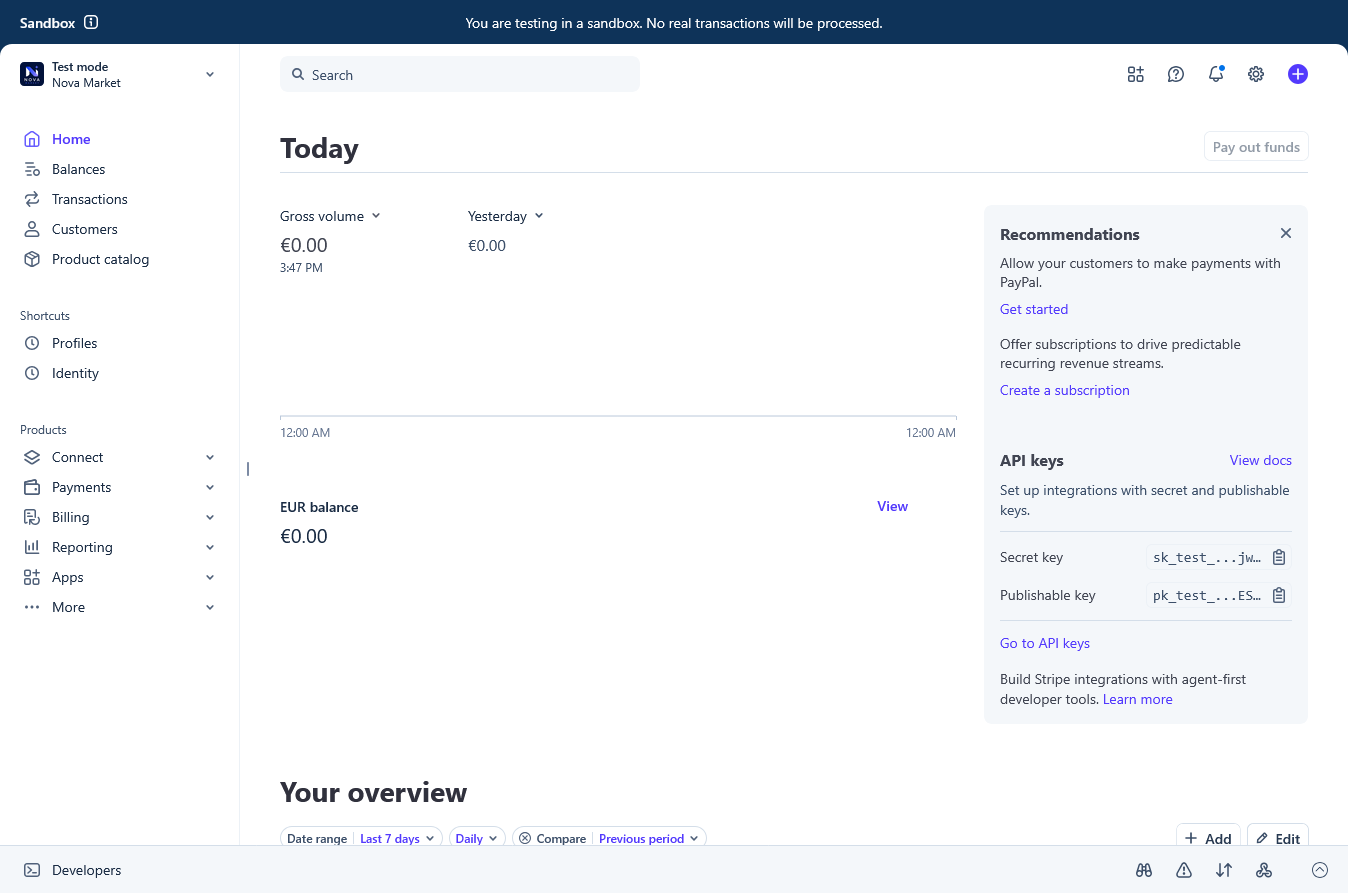
- On your sandbox dashboard, copy the Publishable key and Secret key from API keys block
-
In your Kreezalid admin panel, go to Settings → Payment service providers and click Add a payment service provider. Select Stripe Connect,
-
Paste the sandbox keys and save
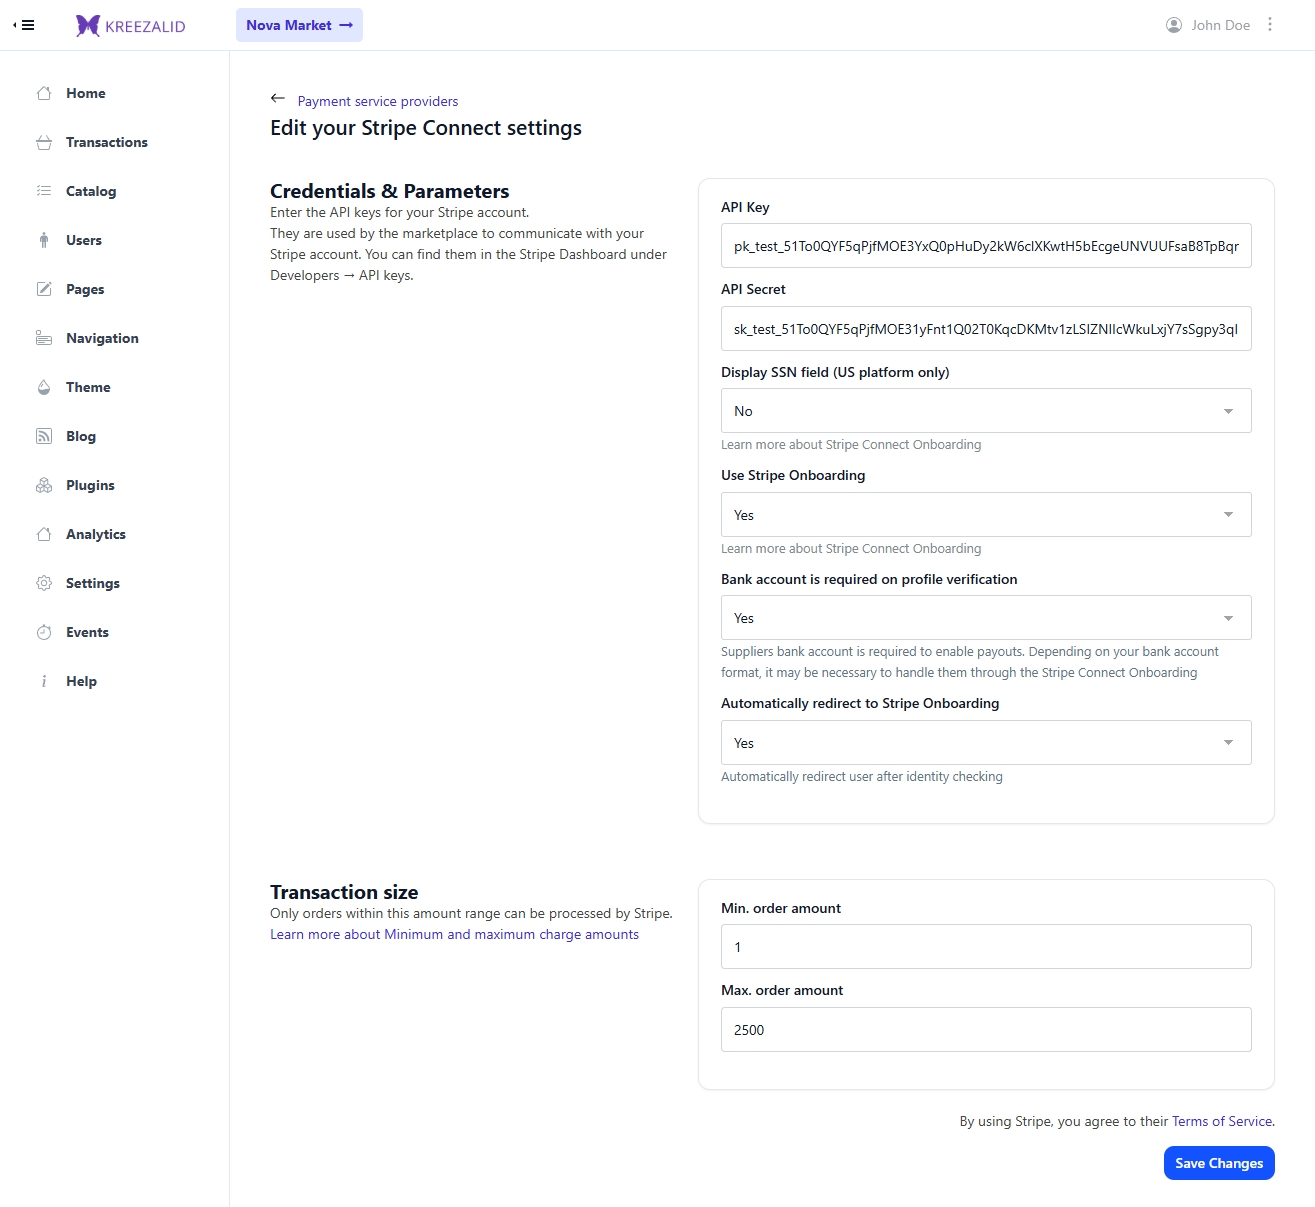
- Activate the payment service provider.
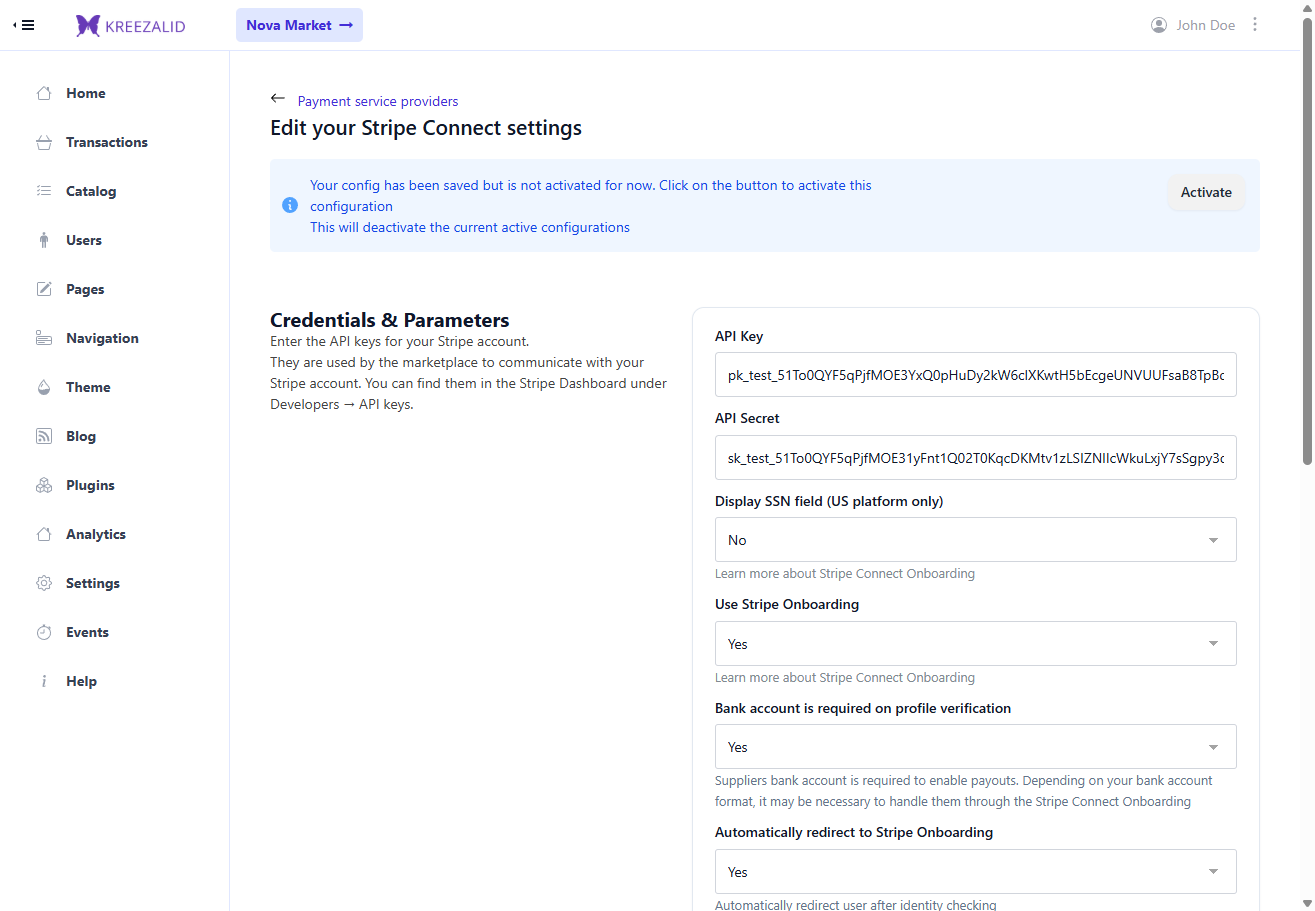
-
Create a test seller account (or use one of the wizard-provided test accounts) in your marketplace and go through the Stripe Connect onboarding with test data (You can find test account numers here.)
-
As a buyer, run through the checkout flow using Stripe’s test card numbers
-
Verify that orders finalize correctly, notification emails are sent, and payments appear in your Stripe sandbox dashboard
Step 4: Switch to Live Credentials and Verify Webhooks
Once you have validated your setup in sandbox, you can switch to your live Stripe credentials.
Enter your live API keys
- In your Stripe Dashboard, switch back to Live mode using the top-right menu button Exit sandbox.
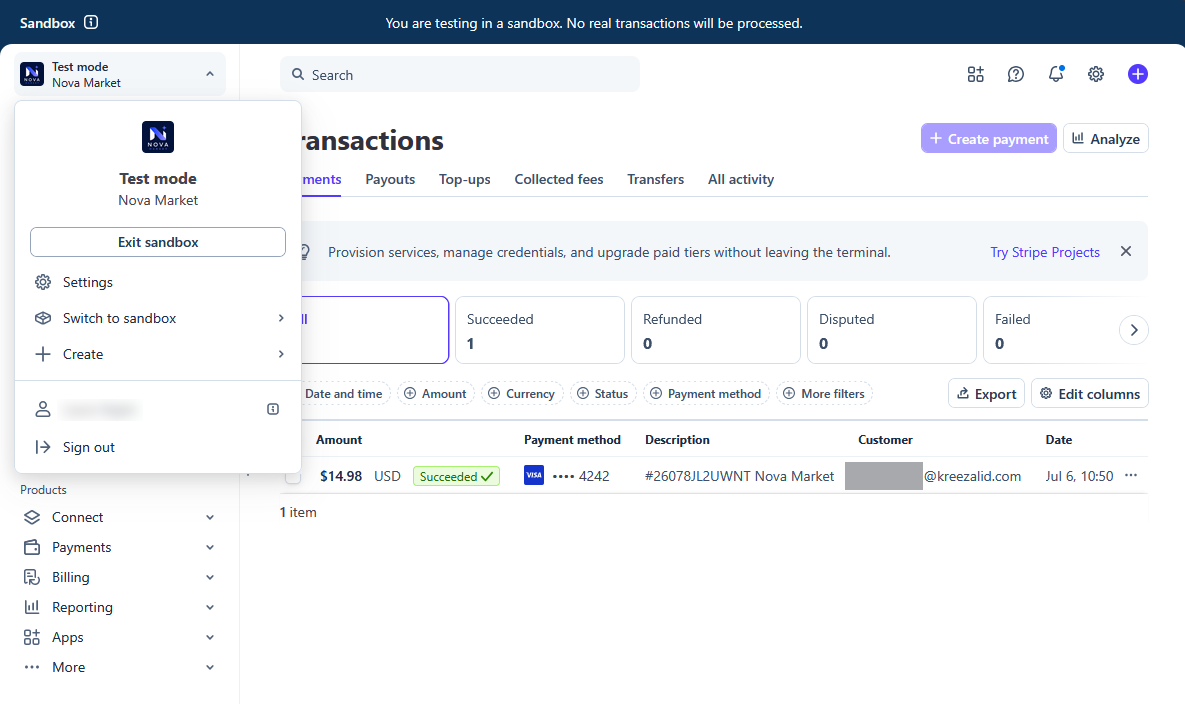
-
On your live dashboard, copy the Publishable key and click Reveal live key next to the Secret key, copy it immediately, and store it somewhere safe — Stripe does not show it again without generating a new one
-
Go to Settings → Payment service providers in Kreezalid and click Add a payment service provider. We recommend to create a new Stripe Connect Custom entry for your live credentials, so you can keep your sandbox configuration intact for future testing.
-
Follow the same steps as in the sandbox test to paste your live keys and save.
-
Activate the payment service provider. The sandbox configuration will be automatically deactivated.
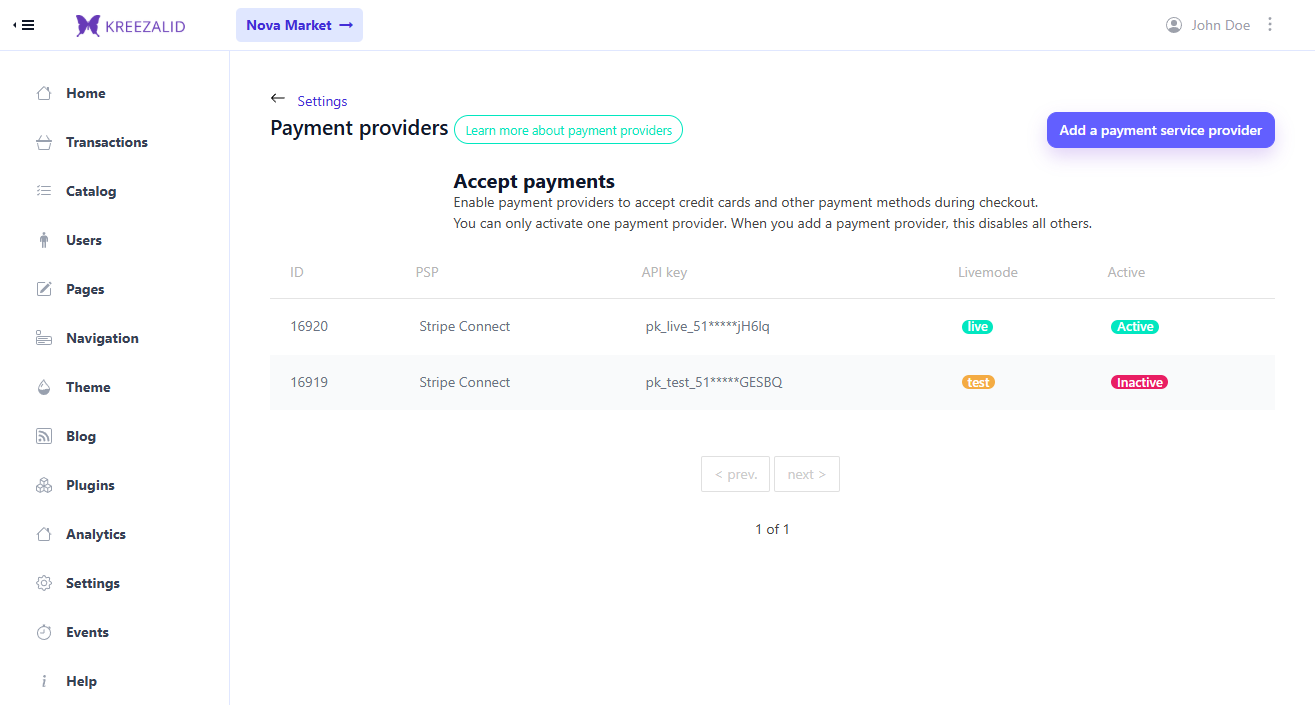
Verify webhook health
Webhooks are the mechanism Stripe uses to notify your marketplace of payment events and seller account changes. They are required for correct operation: without healthy webhooks, checkout sessions may not finalize orders and seller account status updates may not be processed.
After saving your live keys, Kreezalid automatically configures the required webhook endpoints with Stripe. Verify that they were created correctly:
- Go to Admin → Payment service providers → Stripe Connect Custom → Manage Webhooks
- The overall status should show Healthy
- Both webhook entries (connected accounts + transactions) should be present with their signing secrets stored
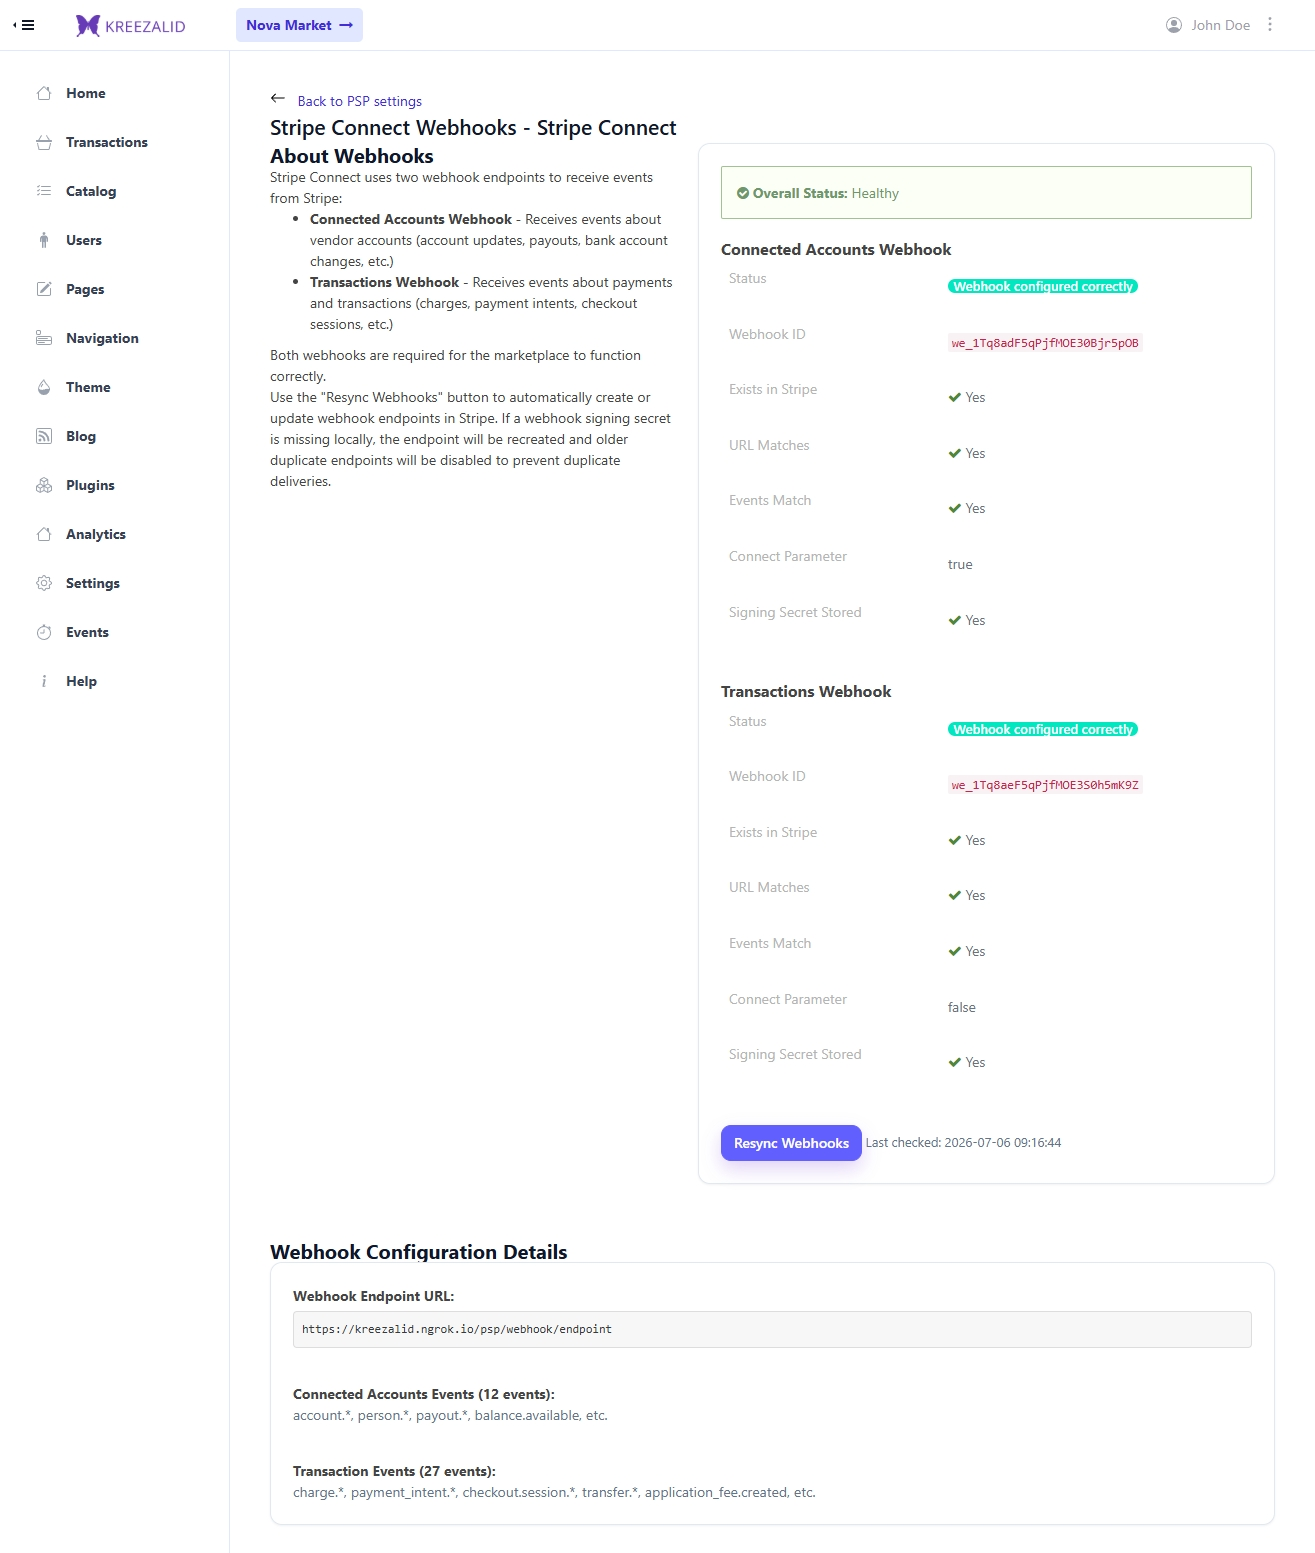
If the status shows a warning or error, click Resync Webhooks. This recreates any missing endpoints and corrects configuration drift.
Never delete webhook endpoints manually from your Stripe Dashboard. If a webhook is broken, always use the Resync Webhooks button in Kreezalid — it will recreate the correct configuration automatically.
You are now ready to onboard your real sellers.
What Happens After Setup
Once your Stripe Connect Custom integration is live and your first sellers start onboarding:
- Sellers are prompted to complete identity verification when they create their first listing
- Listings from sellers who have not completed verification, or whose account has since been restricted, are not purchasable by buyers — this is enforced automatically at checkout
- You can monitor all seller account statuses and take action from Admin → Payment service providers → Stripe Connect Custom → Users